Photoshop Tutorials
There are a lot of things to fix in photo repair, Some is grain for smaller images, but the basic ones are;
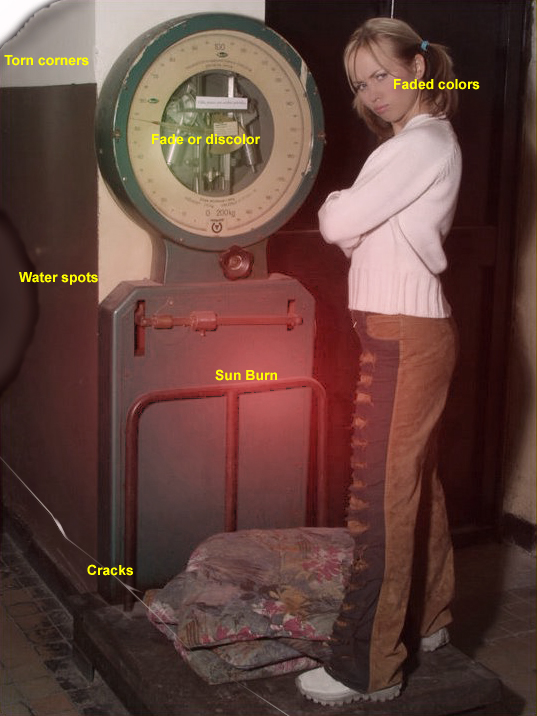
Torn corners
Cracks
Color changes
Fading
Sun burn from pictures exposed to the sun too long.
I'm going to start with the hardest, and that is Sun Burn
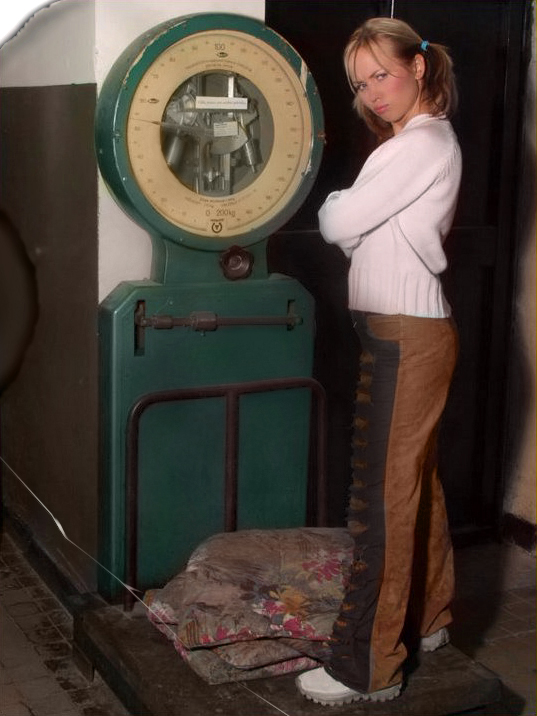
For that you will need to go into the RGB Channels, and fix the faded areas of the image. Most of the time it will apear to have the center faded
in the red Channel. First you select the area with the Elliptical Marquee tool
Then go to Select/Feather... Set the radius to a high number, and use Brightness and Contrast to test it to try and get the right feathering that matches
up with what is faded. You can use undo until you get something as close as you can, and when you find something that works best and the brightness, and contrast
will bring that back. Make adjustments to the other layers, if they are faded. Layers that are dark are fine, but you may find some that are spotted, and you
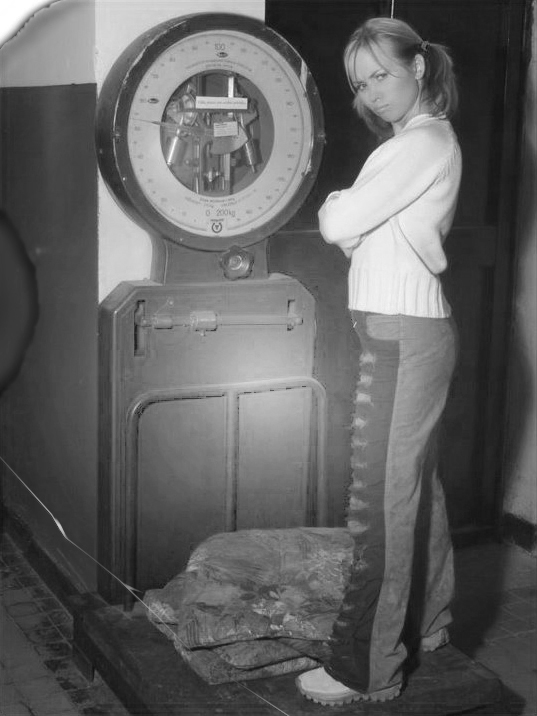
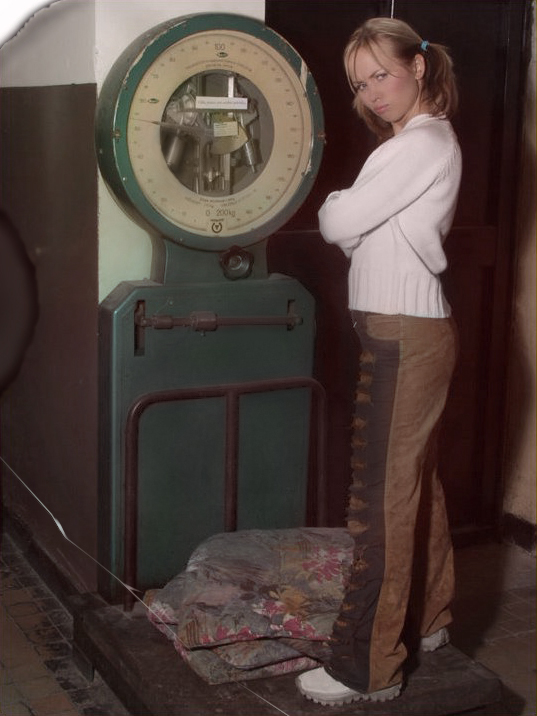
can try to smooth them out. When you change back to color, the colors will be off, but better than before. To fix the colors you use the brush, and change
the settings on mode to color, and pick up colors that look right, and use them to fix the colors for the rest of the object, or areas.
You can use the burn tool for touchups, but if you use it too much the image will lose contrast.
For color adjustment the original colors are in the color levels.
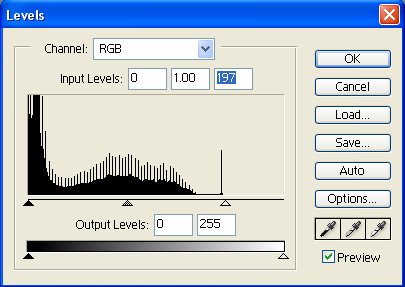
Image/Adjustments/Levels. On each color you will see the top and bottom areas of the colors
that don't have any markings. You just bring the marker up to where the marking start, and this will make the image restore it's original colors
before age and photo editing was done. You can look at the image to see how this effect it, and use the center to adjust the midtones. You can work
with this to get the picture to it's best colors. Then for small adjustment you can use the Image/Adjustments/Color Ballance...
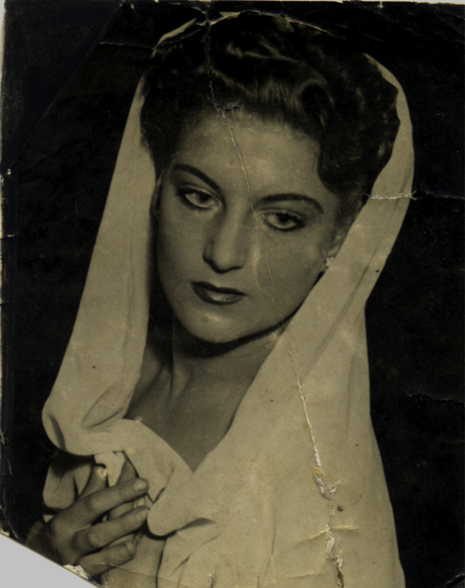
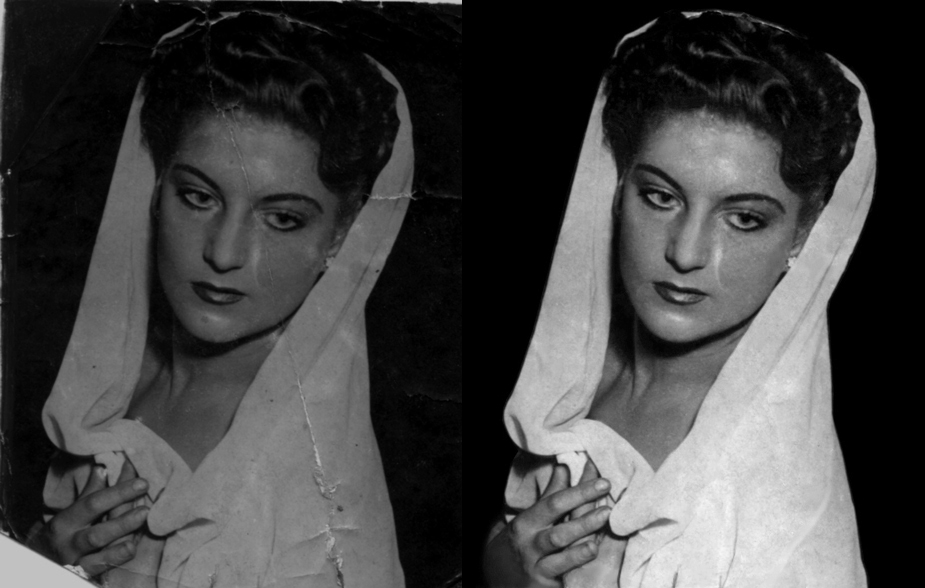
For missing corners you will need to redraw what is missing with the brush. This will get your artistic skills up.
For Photoshop Versions 7 and up you can use the Healing Brush tool to repair the cracks, but for early versions you will need to use the Clone
Stamp Tool, and select an area close to the crack to help match the best.
For areas the are close to the edges, or have lines in them, use the brush and use the Alt key to pick up colors close to patch the areas with.
For rough spoty areas you can smooth them ou a little with a light brushing. The background is not as important as the person in the picture, so
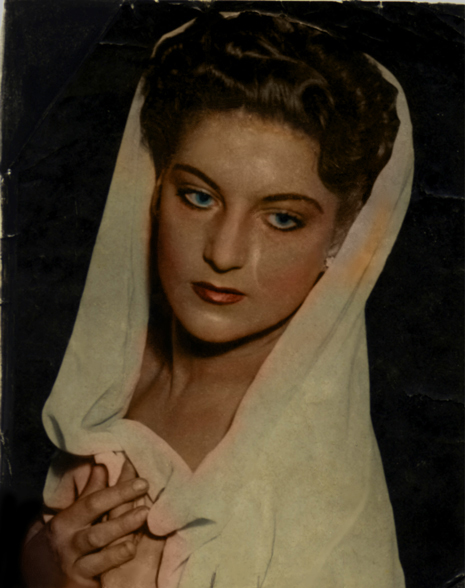
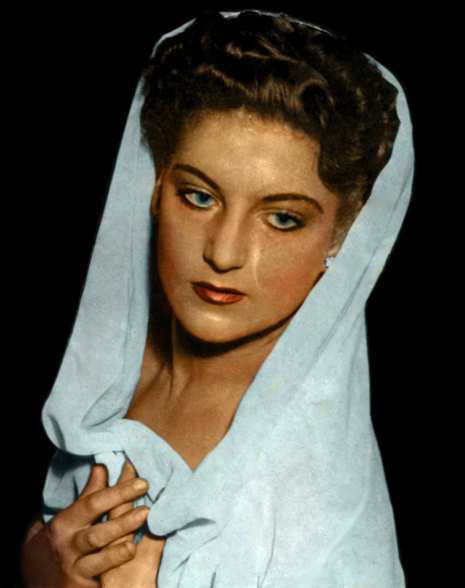
you don't need to spend a lot of time with that. Right now it is just the person in the picture. With a black and white picture, you might want to color
everything, and if the person likes the black and white, it is a lot smoother after you color it with the brush with the mode set to color.
The face is a light skin color with some light red in some places, like shadows, blush, around the eyes, and nose, and ears.
With this part you don't need to worry about getting color every where, because the skin is important to give it a look, as if it was
always a color image. Some people like to use colorize in the Hue and Saturation, but this way is more realistic.
I colored the Scarf with the brush, and used the white to give it more of a pale color the I used the Eyedropper Tool to pick up that color
and use it at 100% so I can draw around the edges, and fill in with that color, and I used white to go over it for highlights, but it is not that
noticed. Then I use the brush to blend in the gray to the edges of the hand and hair. To finish it I used the Paragonal Laso Tool to select around and get
close to the edge to fill it in with black. It was still drab looking so I adjusted the levels, and this is finished.
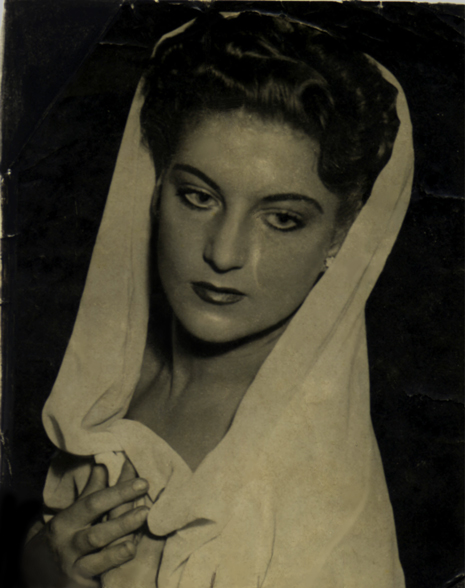
To have a black and white version I used Image/Adjustments/Desaturate. I did the same thing with the original to show that brushing in colors
does not change the gray scale picture, but a lot was done to make this picture look a lot better.